
Table of Contents
Scanning a doc is a straightforward method to share and edit paperwork digitally. You do not want something greater than your Android cellphone and its digicam. Even should you’re rocking certainly one of our favourite price range Android telephones, you may scan clear photographs of paperwork for skilled or personal use.
This information walks you thru 3 ways to scan paperwork along with your Android cellphone. Tons of of document-scanning apps can be found, however we advocate Google Drive, Adobe Scan, and Microsoft Workplace Lens. These apps can be found for Android and iOS gadgets. Nevertheless, it is also price exploring Google Stack, because it’s Google’s devoted doc scanner.
How you can scan a doc in your cellphone with Microsoft Workplace Lens
Of those 4 choices, Microsoft Workplace Lens might be the most effective. Whether or not or not you are deeply built-in into Microsoft’s Workplace suite and providers, it is quick and simple with a easy interface and all of the instruments you want.
For those who scan paperwork usually out of your cellphone, use this app. Its perks embody:
- Integration with Microsoft apps and providers like OneNote, OneDrive, Phrase, and PowerPoint.
- Textual content copy to Microsoft Phrase.
- Easy, super-fast interface.
- Works with photographs and images you have already got.
Of all of the apps on this listing, it is the best to make use of.
How you can scan a doc with Microsoft Workplace Lens
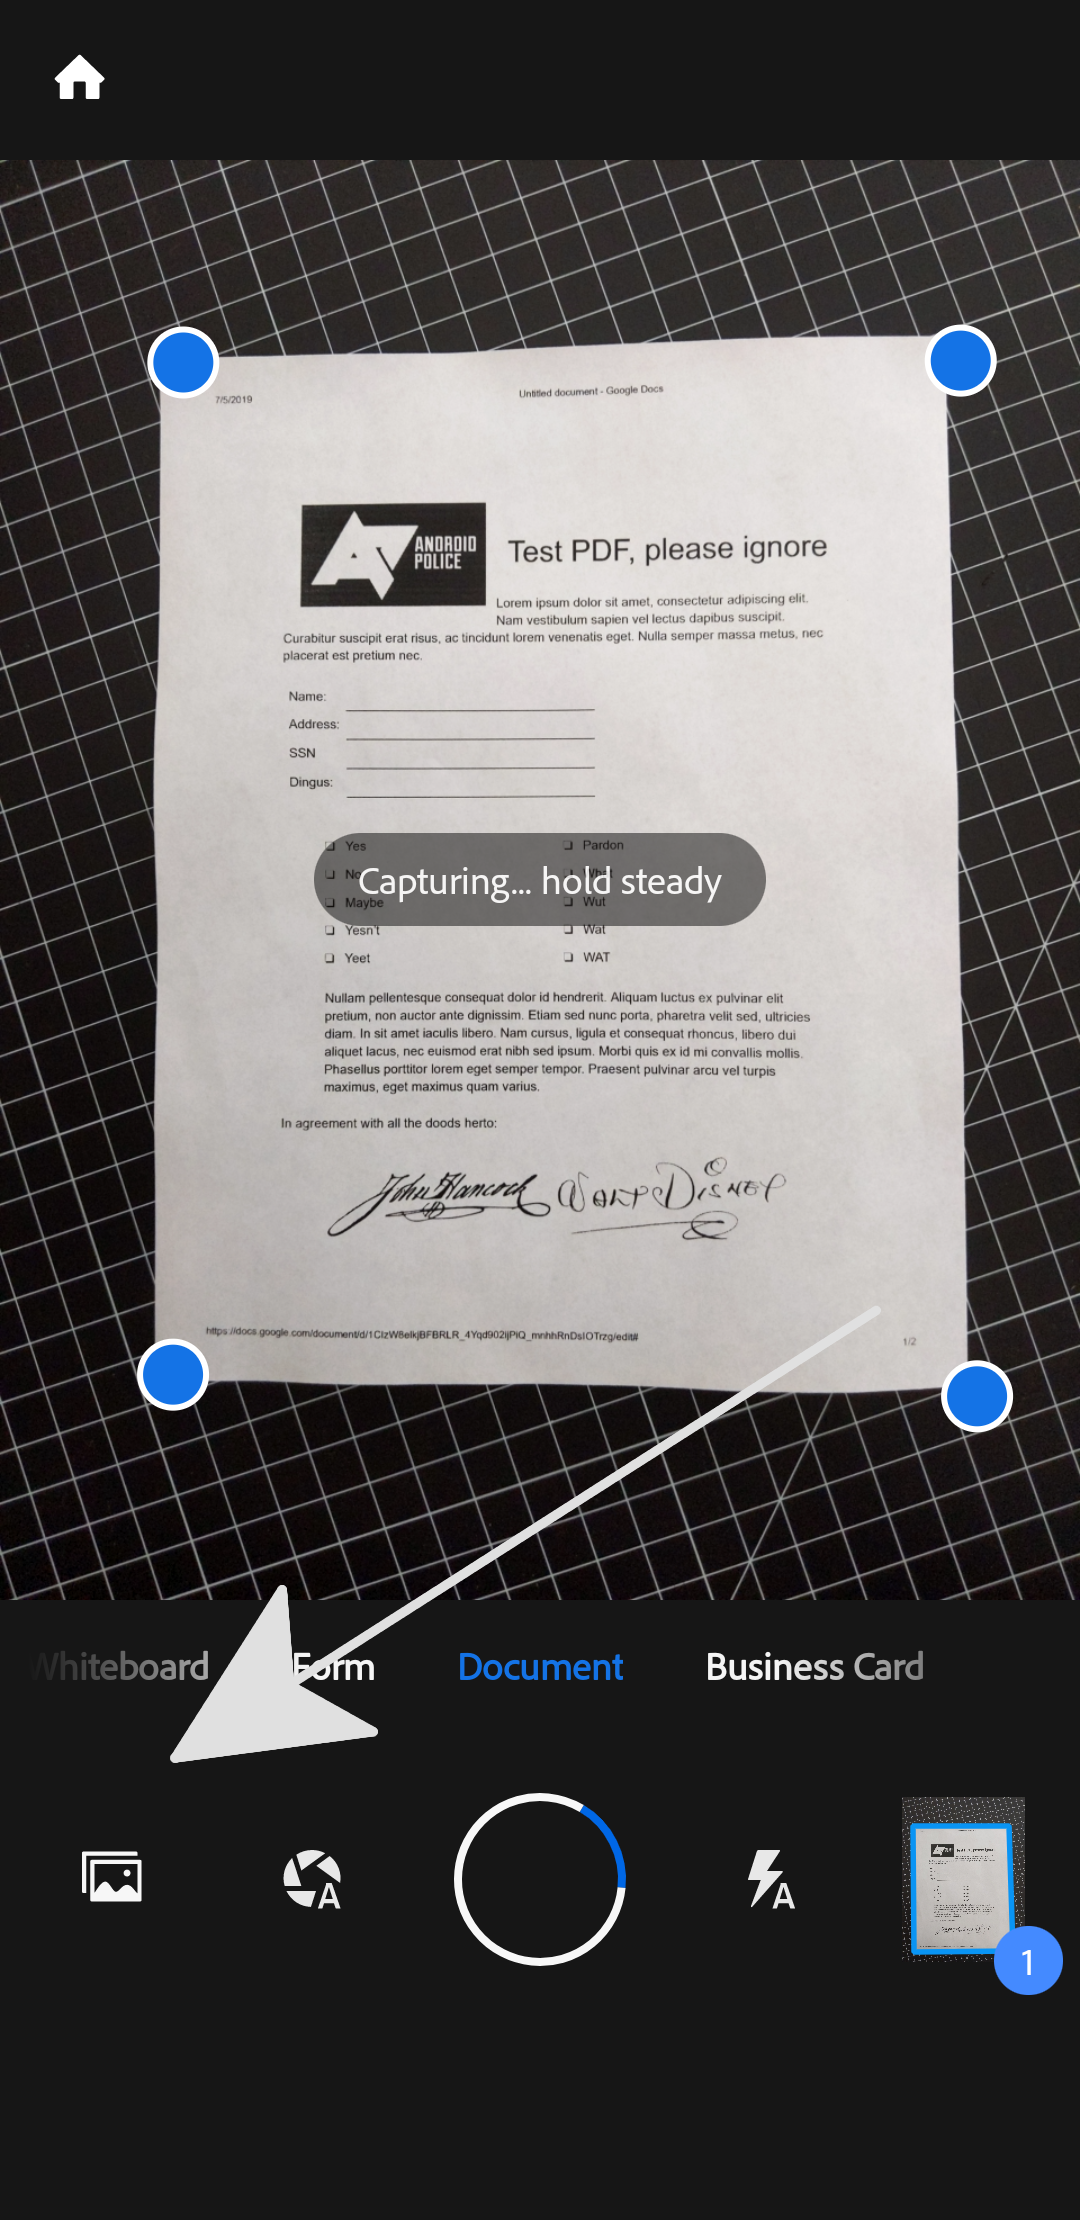
Once you launch the app, you are taken straight to the viewfinder (beneath middle).
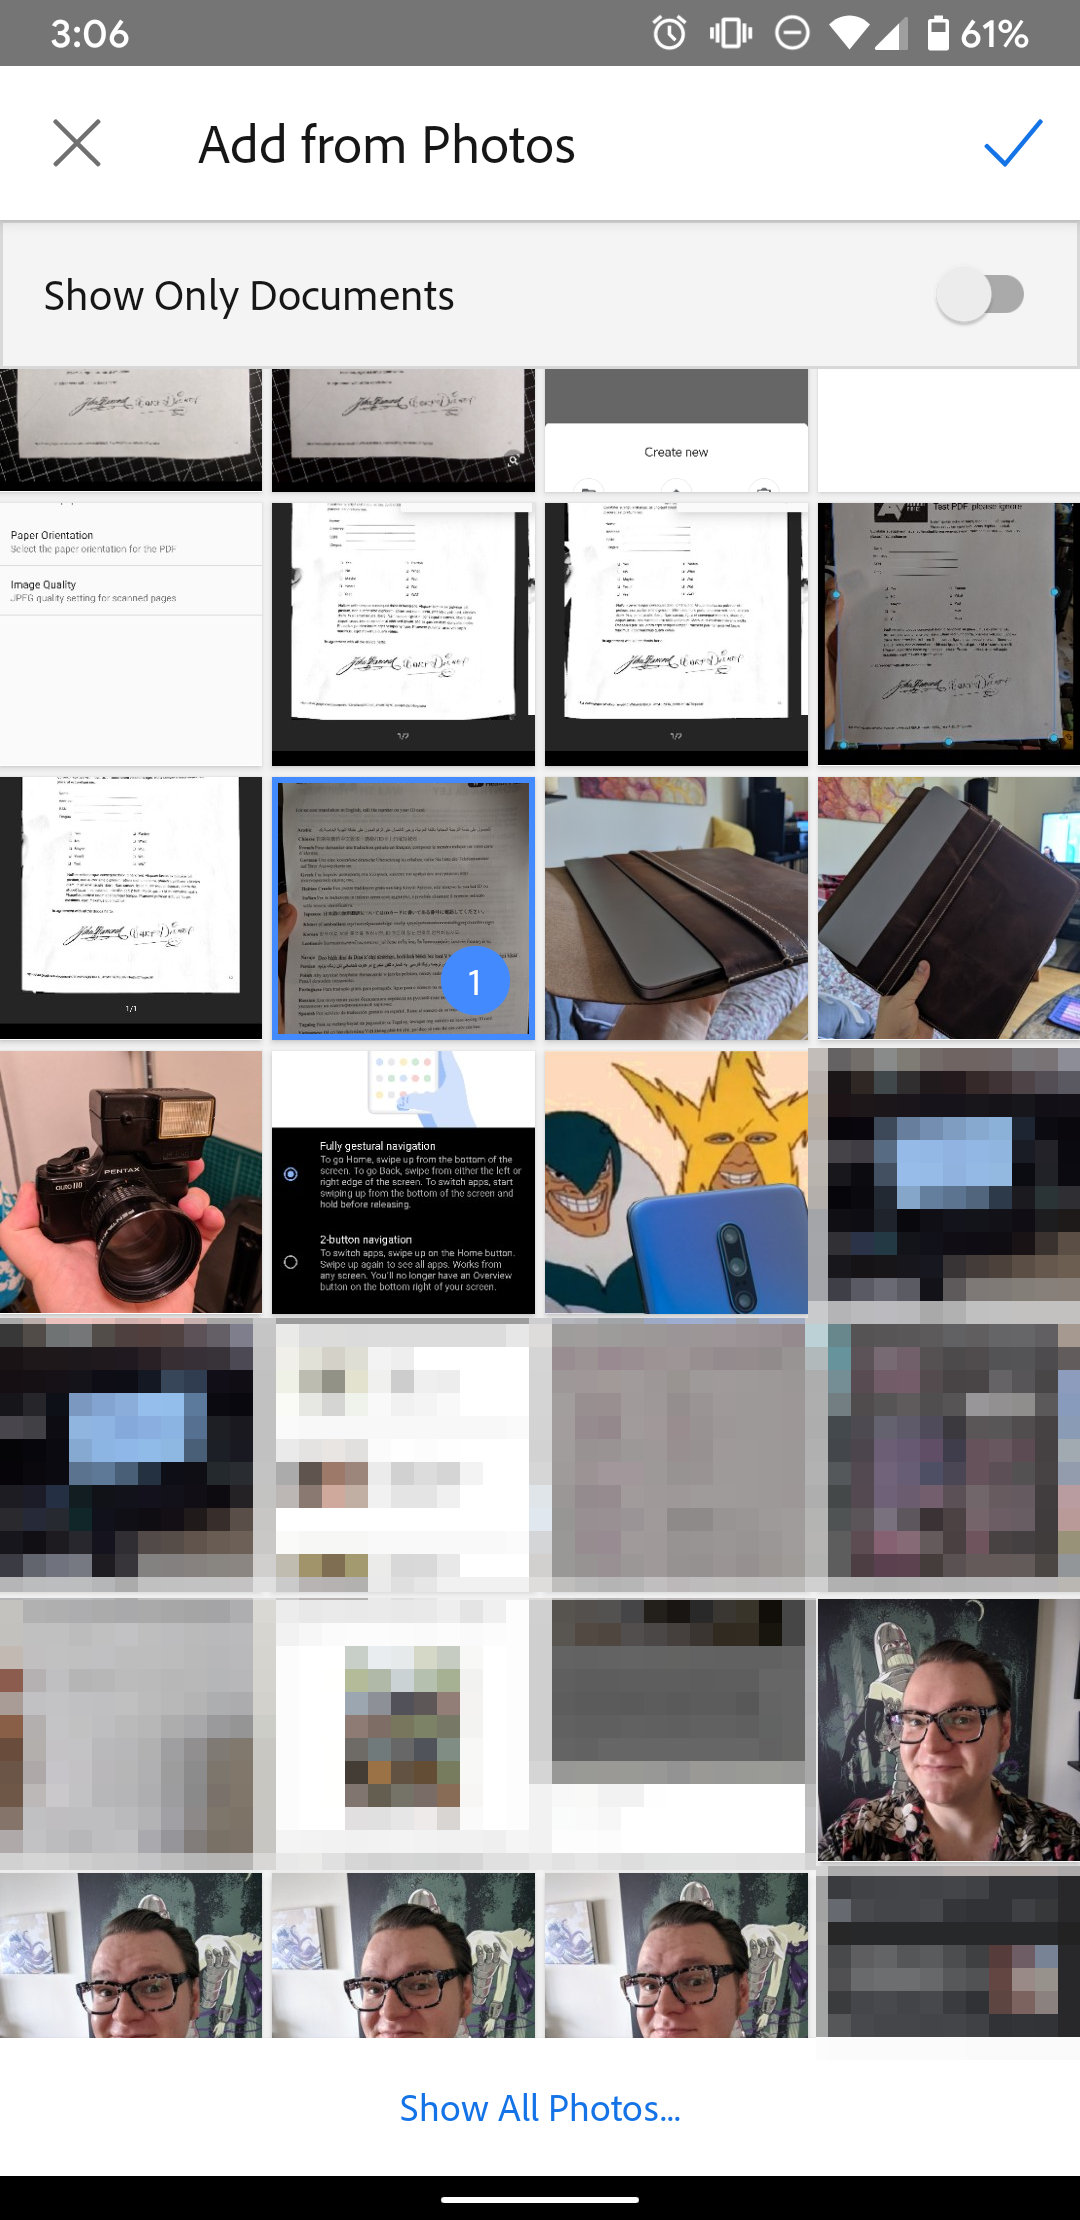
Left: Firing up the app for the primary time. Heart: Viewfinder. Proper: Deciding on photographs from the digicam roll.
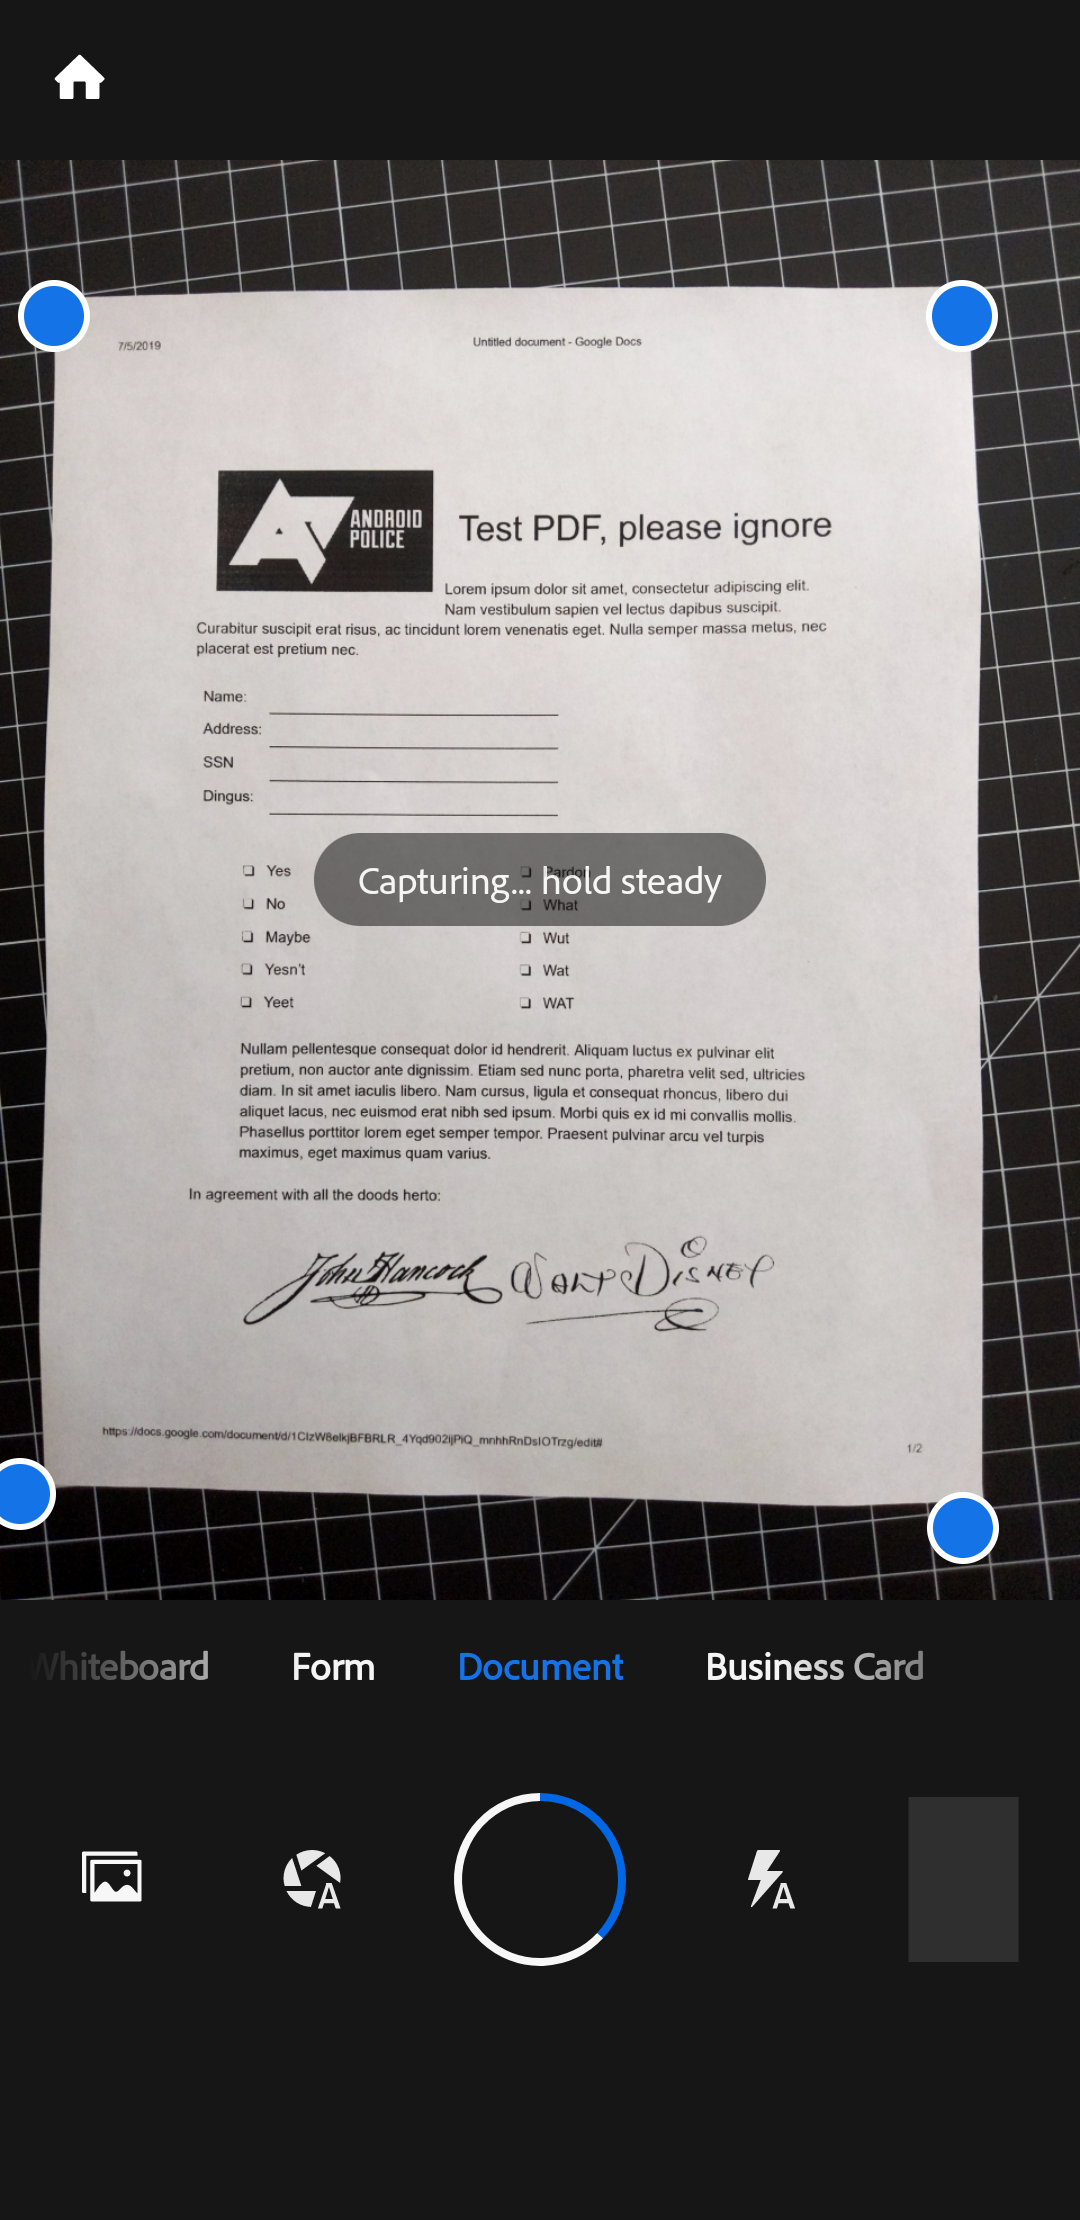
The viewfinder has all of the instruments you want instantly accessible with only a few faucets. Alongside the underside of the viewfinder, beneath the shutter, are totally different modes you may swap between based mostly on what you are scanning. You may most likely use the default Doc mode, however you may rapidly swap to scanning enterprise playing cards, images, and whiteboards, every of which triggers its preset modes.
Above the shutter is your digicam roll, providing easy accessibility to pictures you captured along with your digicam app. Faucet the pictures you need so as to add to a doc after which faucet the orange arrow to the suitable of the shutter button (above proper). You may also faucet the {photograph}/gallery icon to get to a file picker to navigate to pictures outdoors the digicam roll.
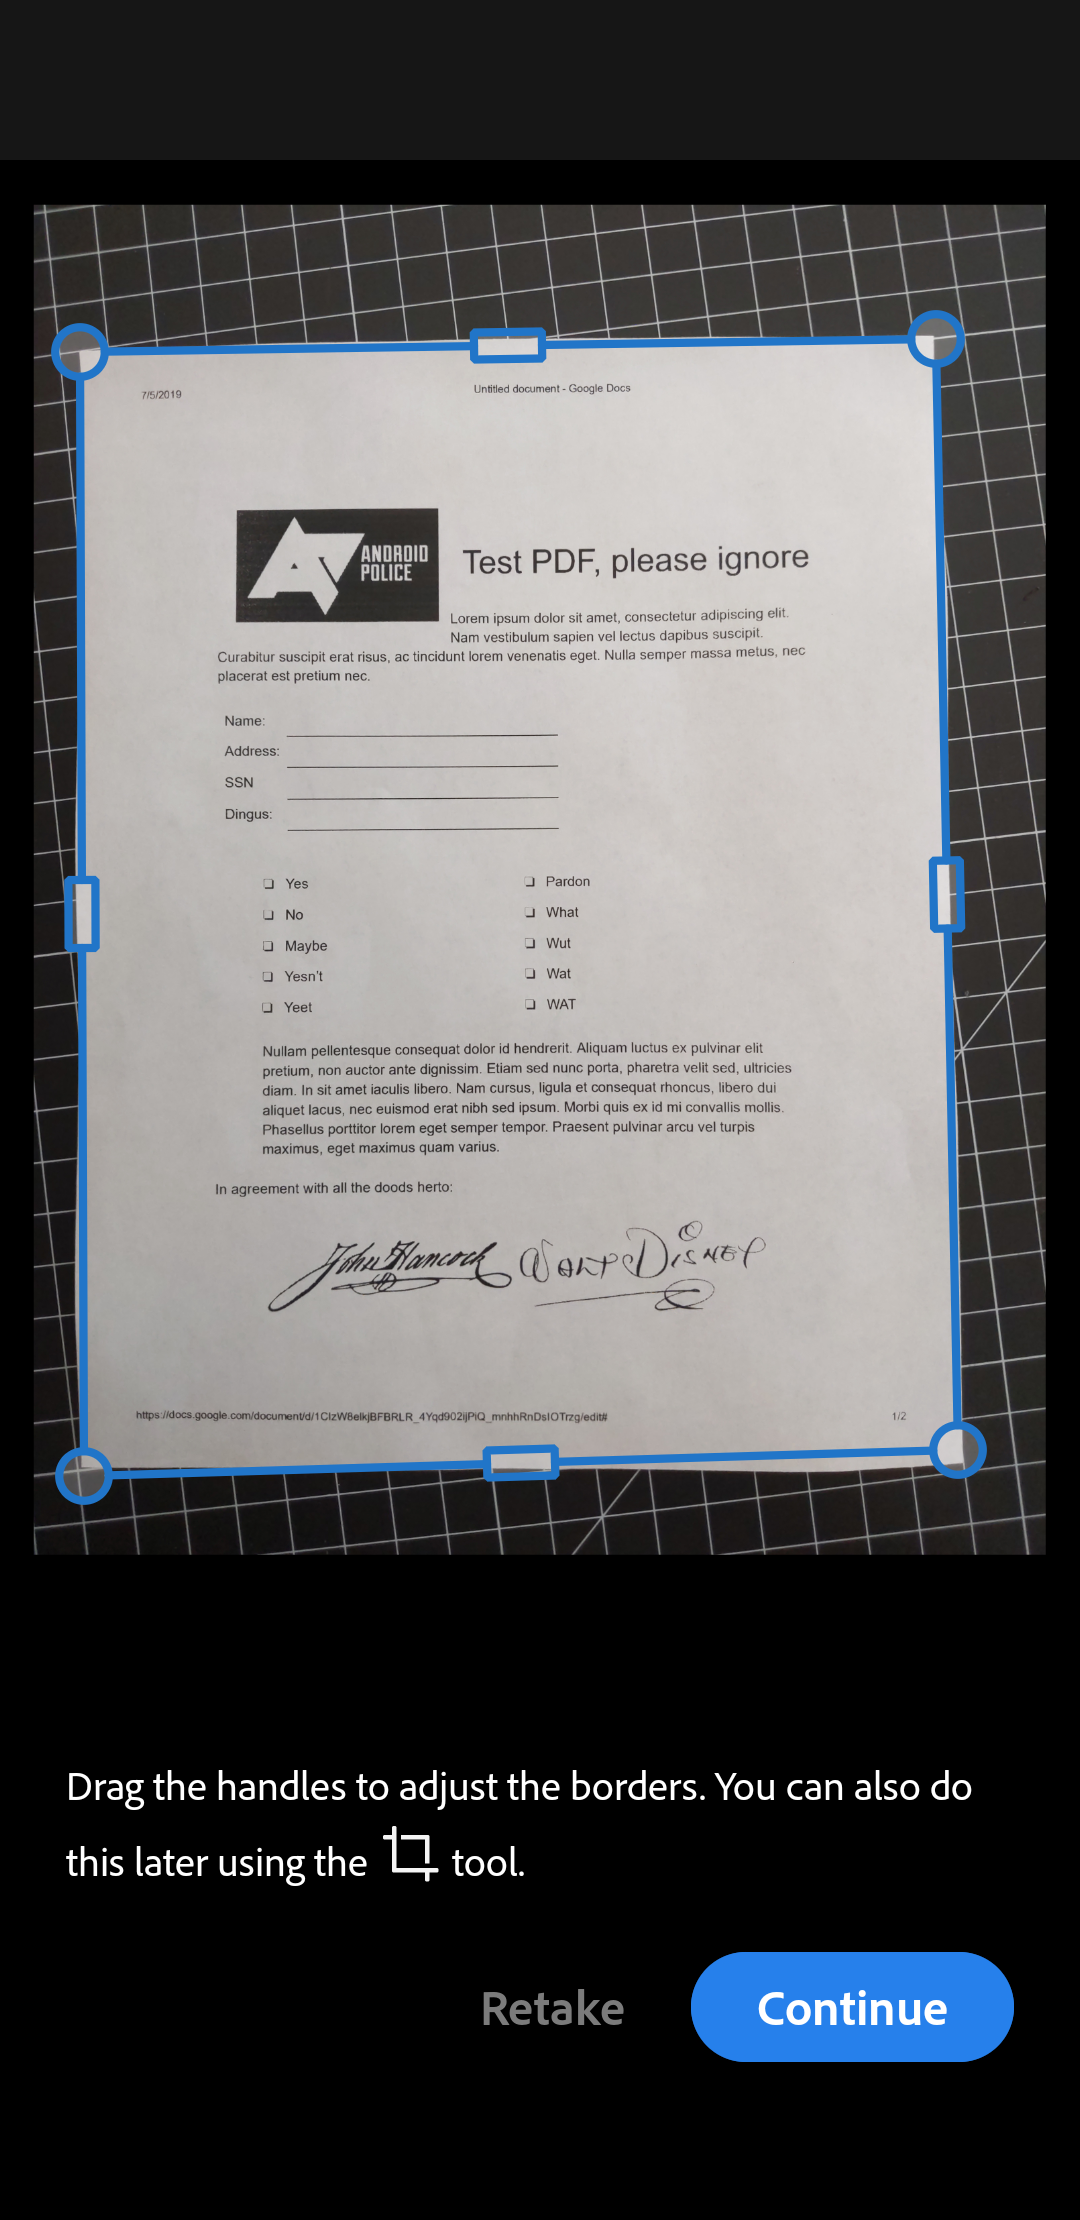
Once you’ve lined up the doc within the viewfinder, an orange-red rectangle signifies a strong lock on its perspective and dimensions (which it may possibly mechanically crop and proper for). Simply observe that should you take images on a grid-like background such as you see pictured above, it would bug out a bit with that computerized cropping. If that occurs, there’s a handbook crop instrument, and solely particular circumstances triggered any misbehavior for us.
How you can edit scanned paperwork in Microsoft Workplace Lens
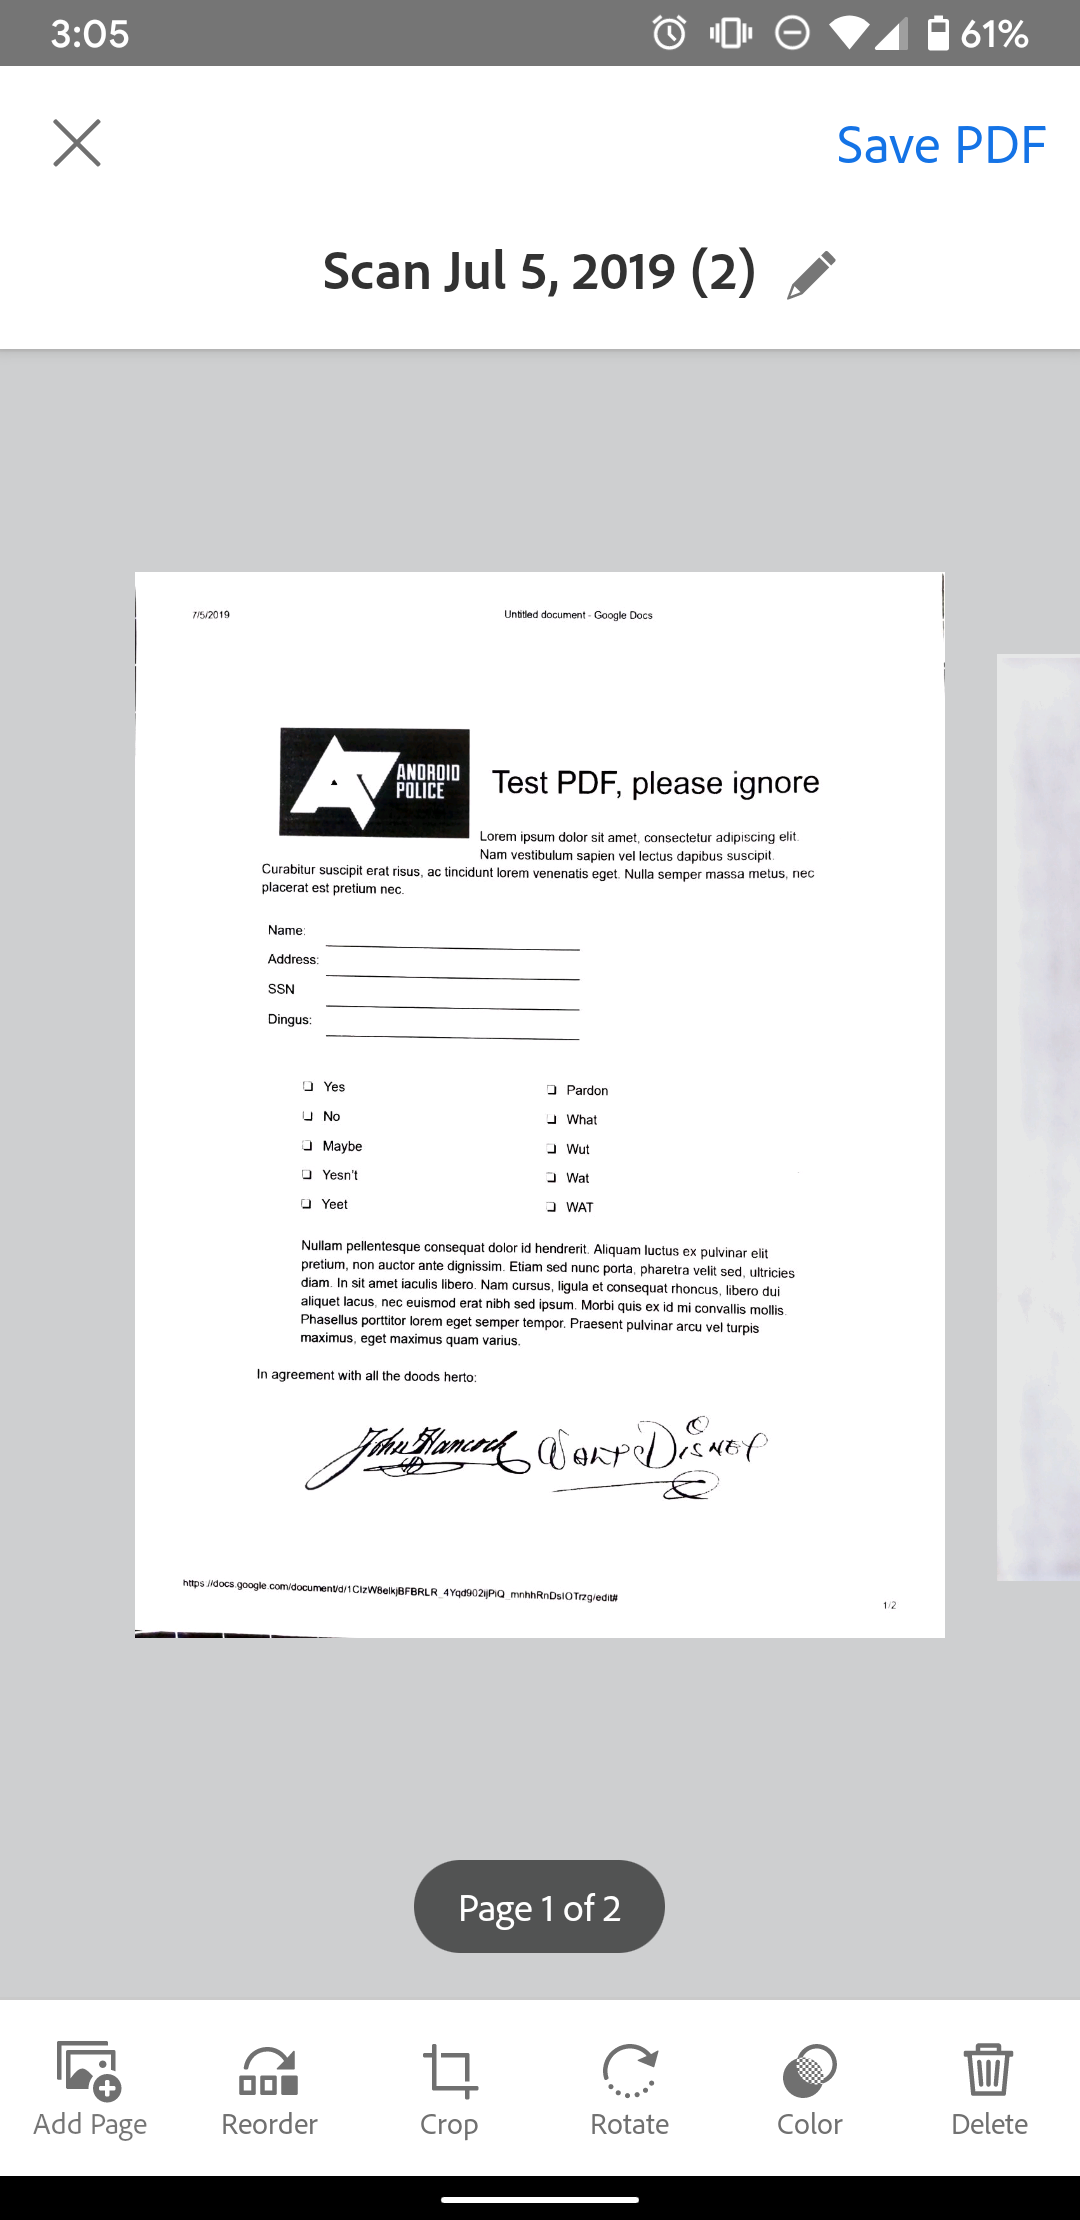
Once you’ve captured a web page to your doc, the workflow to tweak it’s easy. If you’ll want to add one other web page to your doc, faucet the Add New button, and you’re taken to the viewfinder so as to add one other picture. Repeat that course of as needed with every web page of the doc.
You possibly can swipe between pages by scrolling left and proper when a number of photographs are loaded. For those who desire to transform your paperwork to black and white or one other look, filters are simply accessible with a fast swipe up.
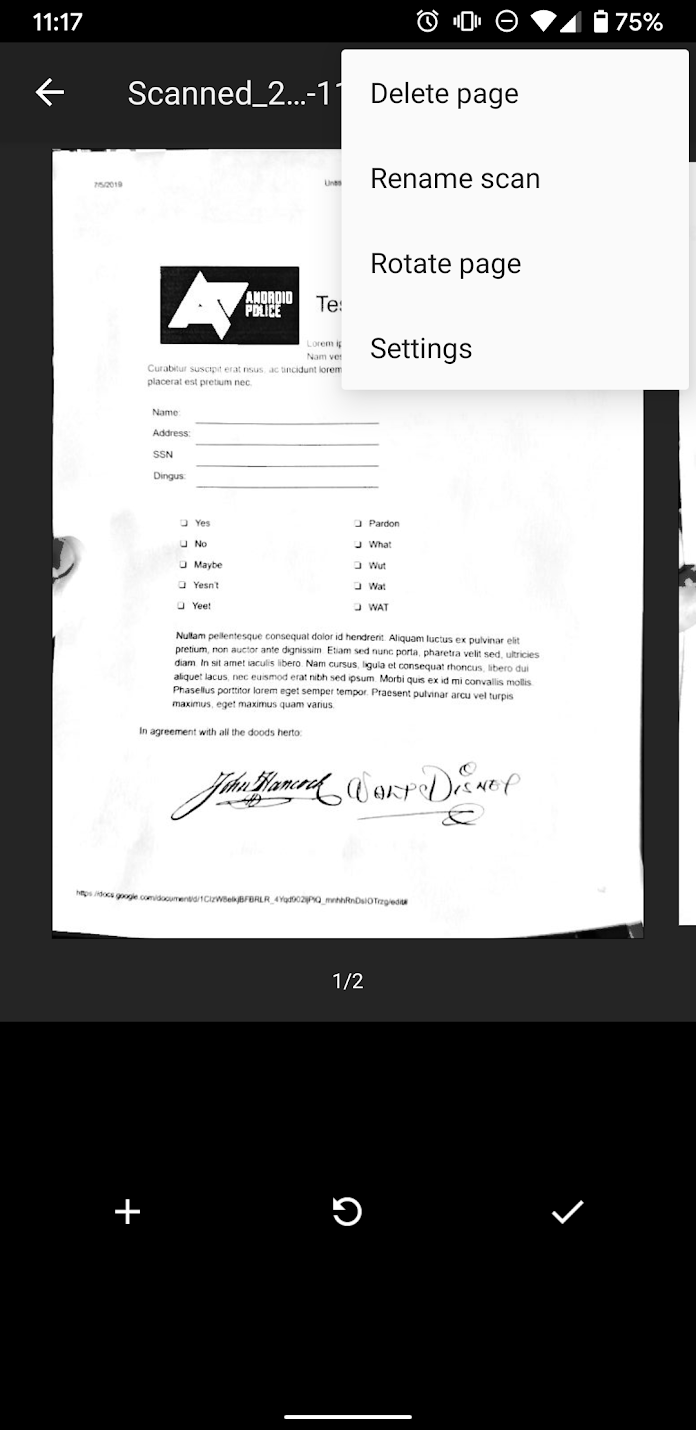
You may discover a lot of the different, much less often used choices on the high of the display. You possibly can delete photographs within the present doc, change their crop, rotate photographs, change their doc sort (which adjusts preset filters), make a textual content overlay, or draw on the doc. With pinch-to-zoom working, you may add a signature or annotate if needed.

How you can export scanned paperwork in Microsoft Workplace Lens
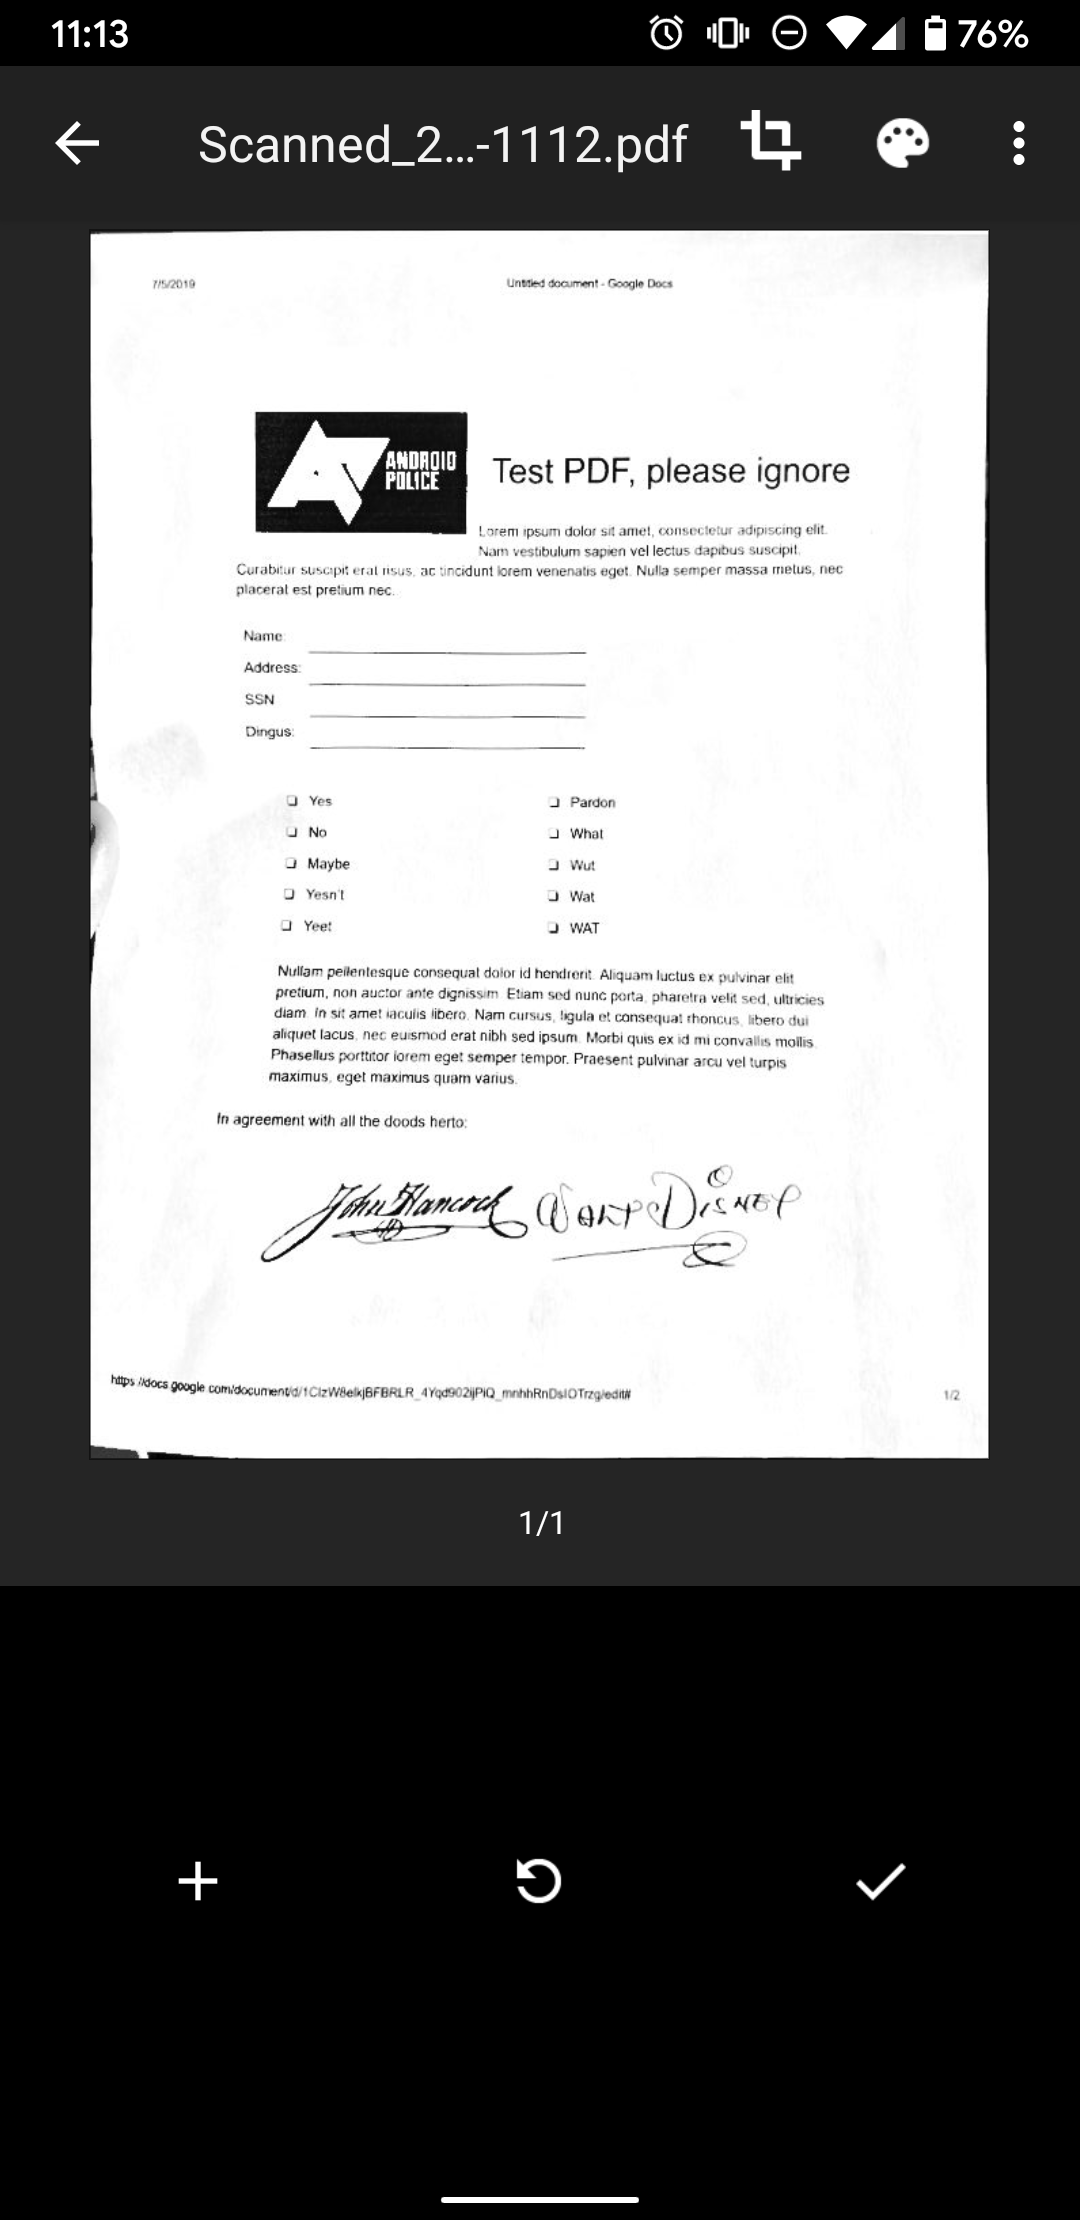
Once you’re completely satisfied along with your scanned doc, you are able to export and put it aside. It can save you it to your Android cellphone’s gallery as a JPEG picture, however there are alternatives to avoid wasting a PDF file to your cellphone’s storage. You may also ship the picture to OneDrive, PowerPoint, or OneNote. Plus, paperwork may be imported to Microsoft Phrase for OCR should you desire to transform them into textual content.
When the doc has been saved in a selected format, you are proven a listing of information you created within the app. From there, you may share or delete them by way of the three-dot menu on every.
There are two different methods to create a PDF in your Android gadget that we listed beneath. The Google Drive app is probably the most handy selection for customers in a pinch, and Adobe Scan is an effective instrument should you dwell within the Acrobat ecosystem. Nevertheless, should you scan paperwork usually, we expect you owe it to your self to strive Microsoft Workplace Lens. It is simply the most effective document-scanning answer we have used.
How you can use Google Drive to scan a doc in your Android cellphone
The explanations to make use of the Google Drive app to your PDF wants are:
- It is easy and simple to make use of.
- You most likely need not set up something. Most telephones include it.
- It syncs PDFs that it creates to Google Drive, a boon to G Suite-based productiveness and cloud storage.
How you can scan a doc with Google Drive
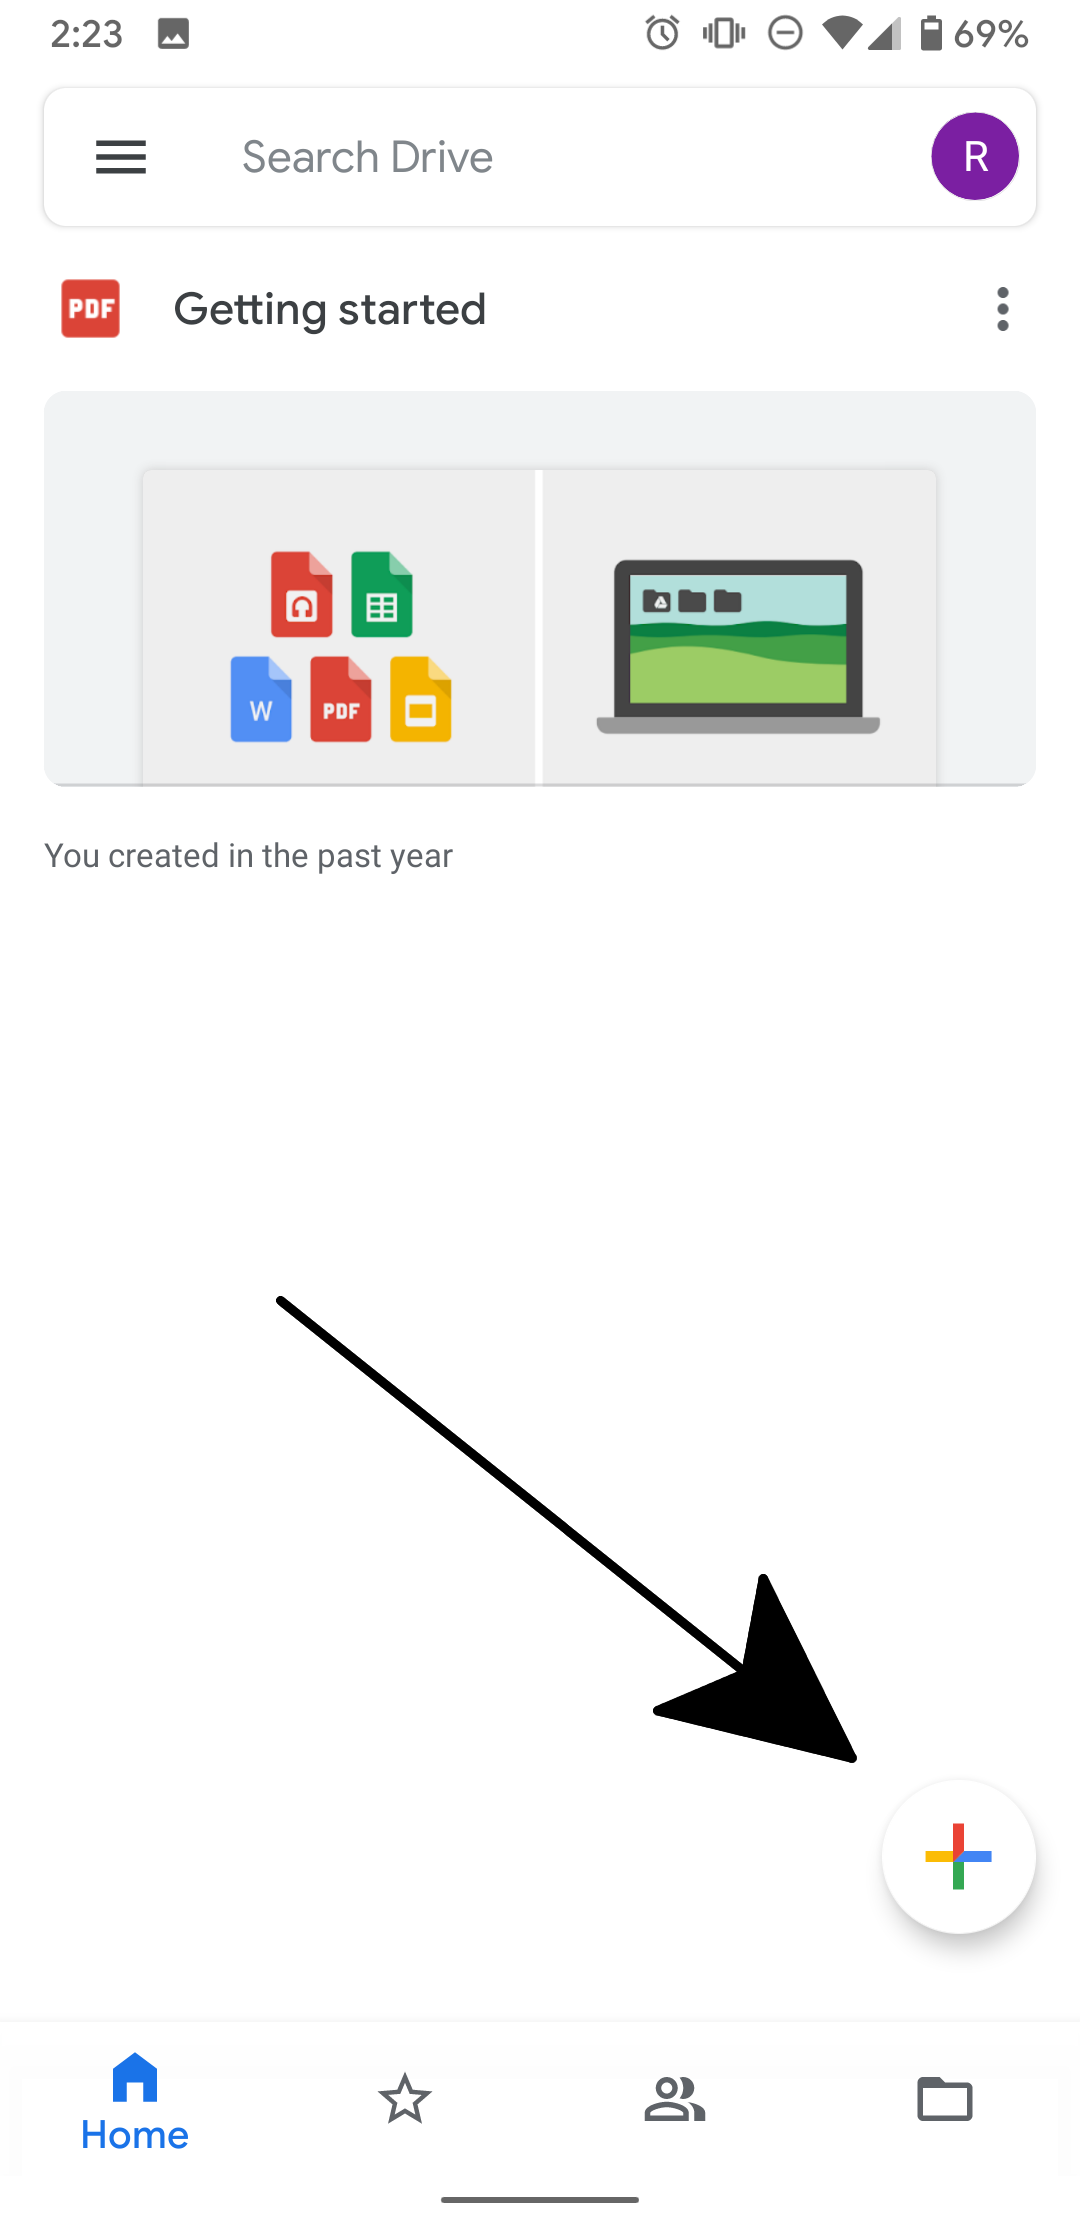
- Open the Google Drive app.
- Faucet the plus button within the lower-right nook.
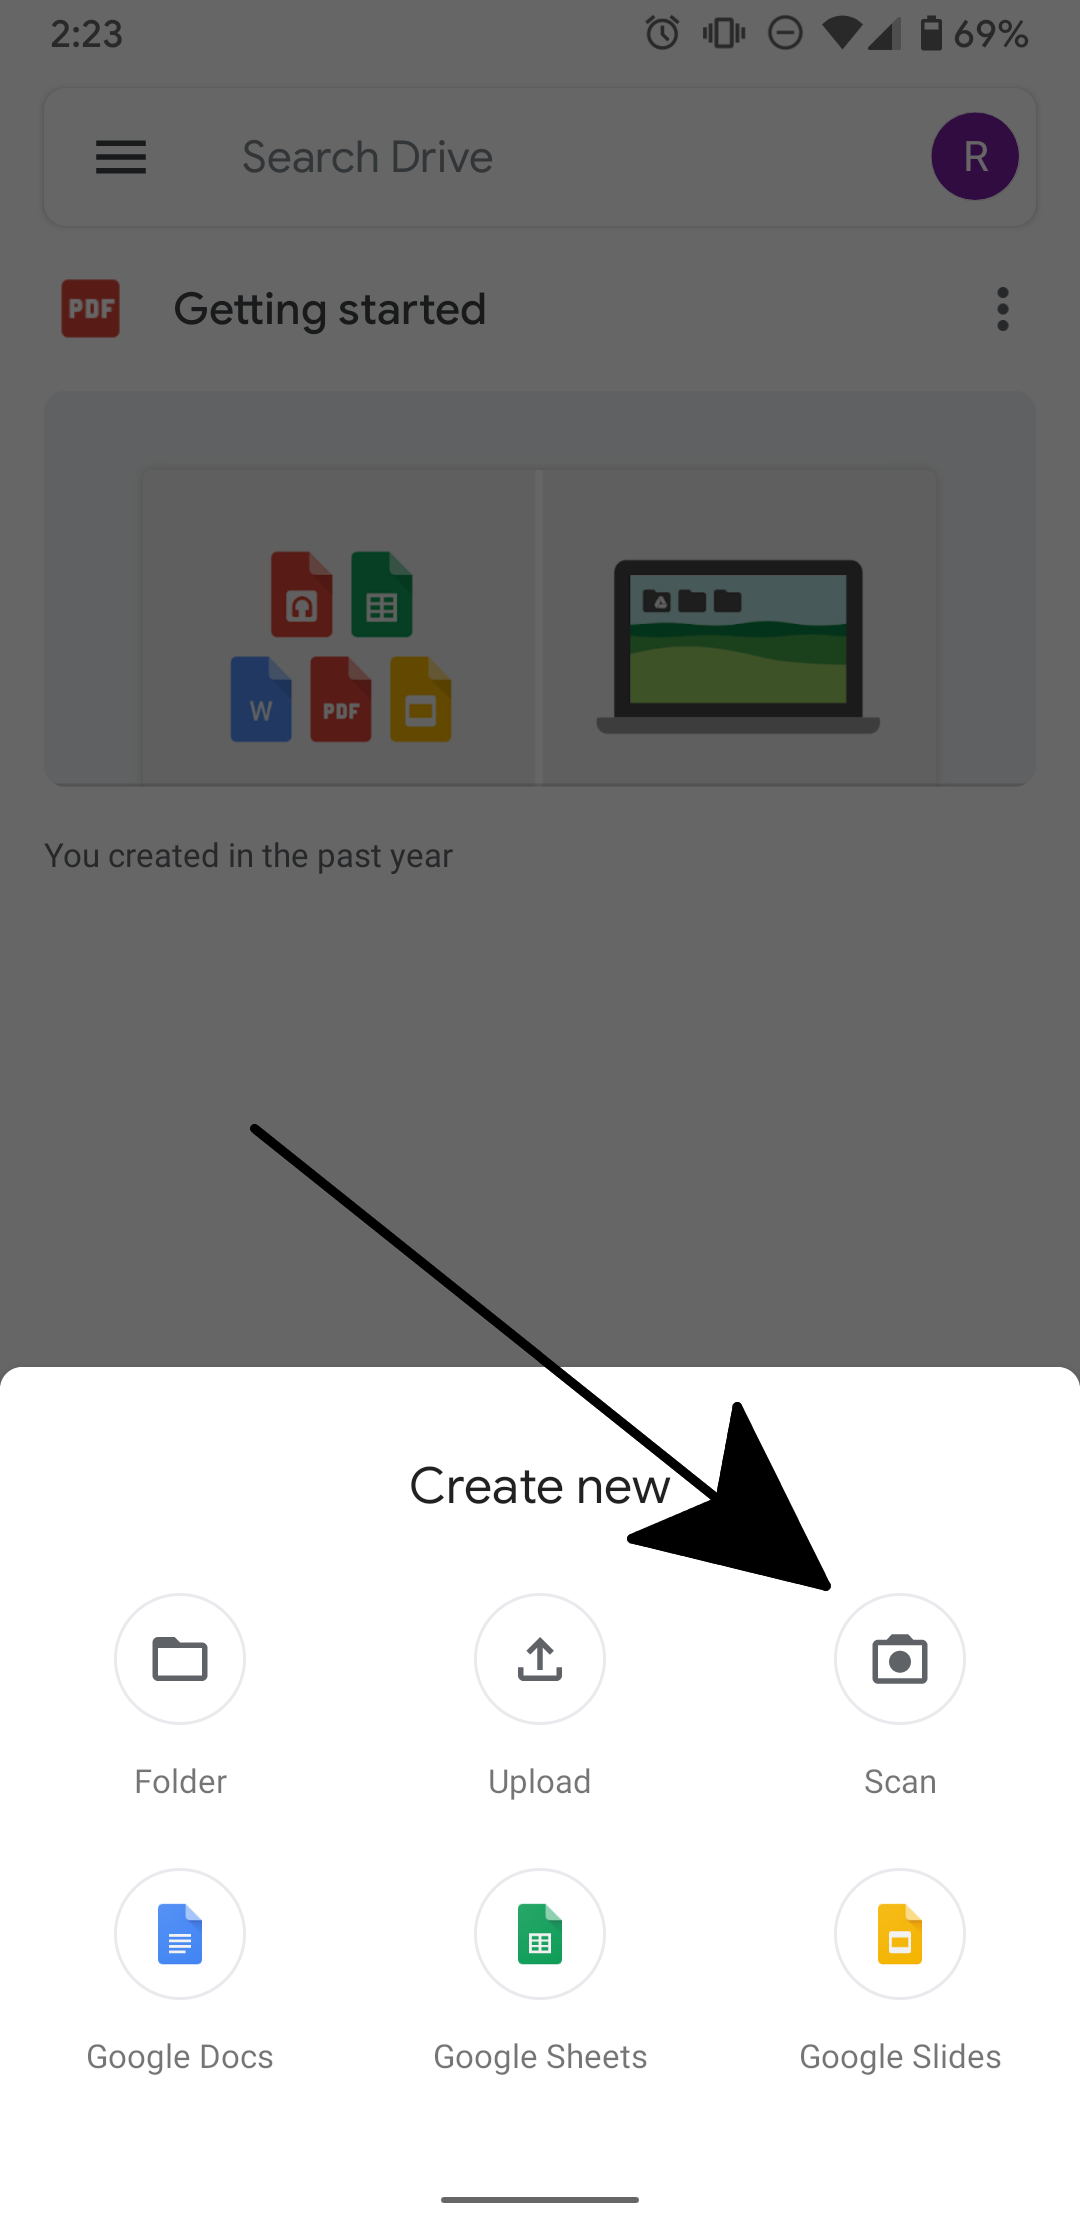
- Choose Scan.
- Line up the doc within the viewfinder, make certain all 4 corners are seen and that your view is generally flat, and press the shutter button.
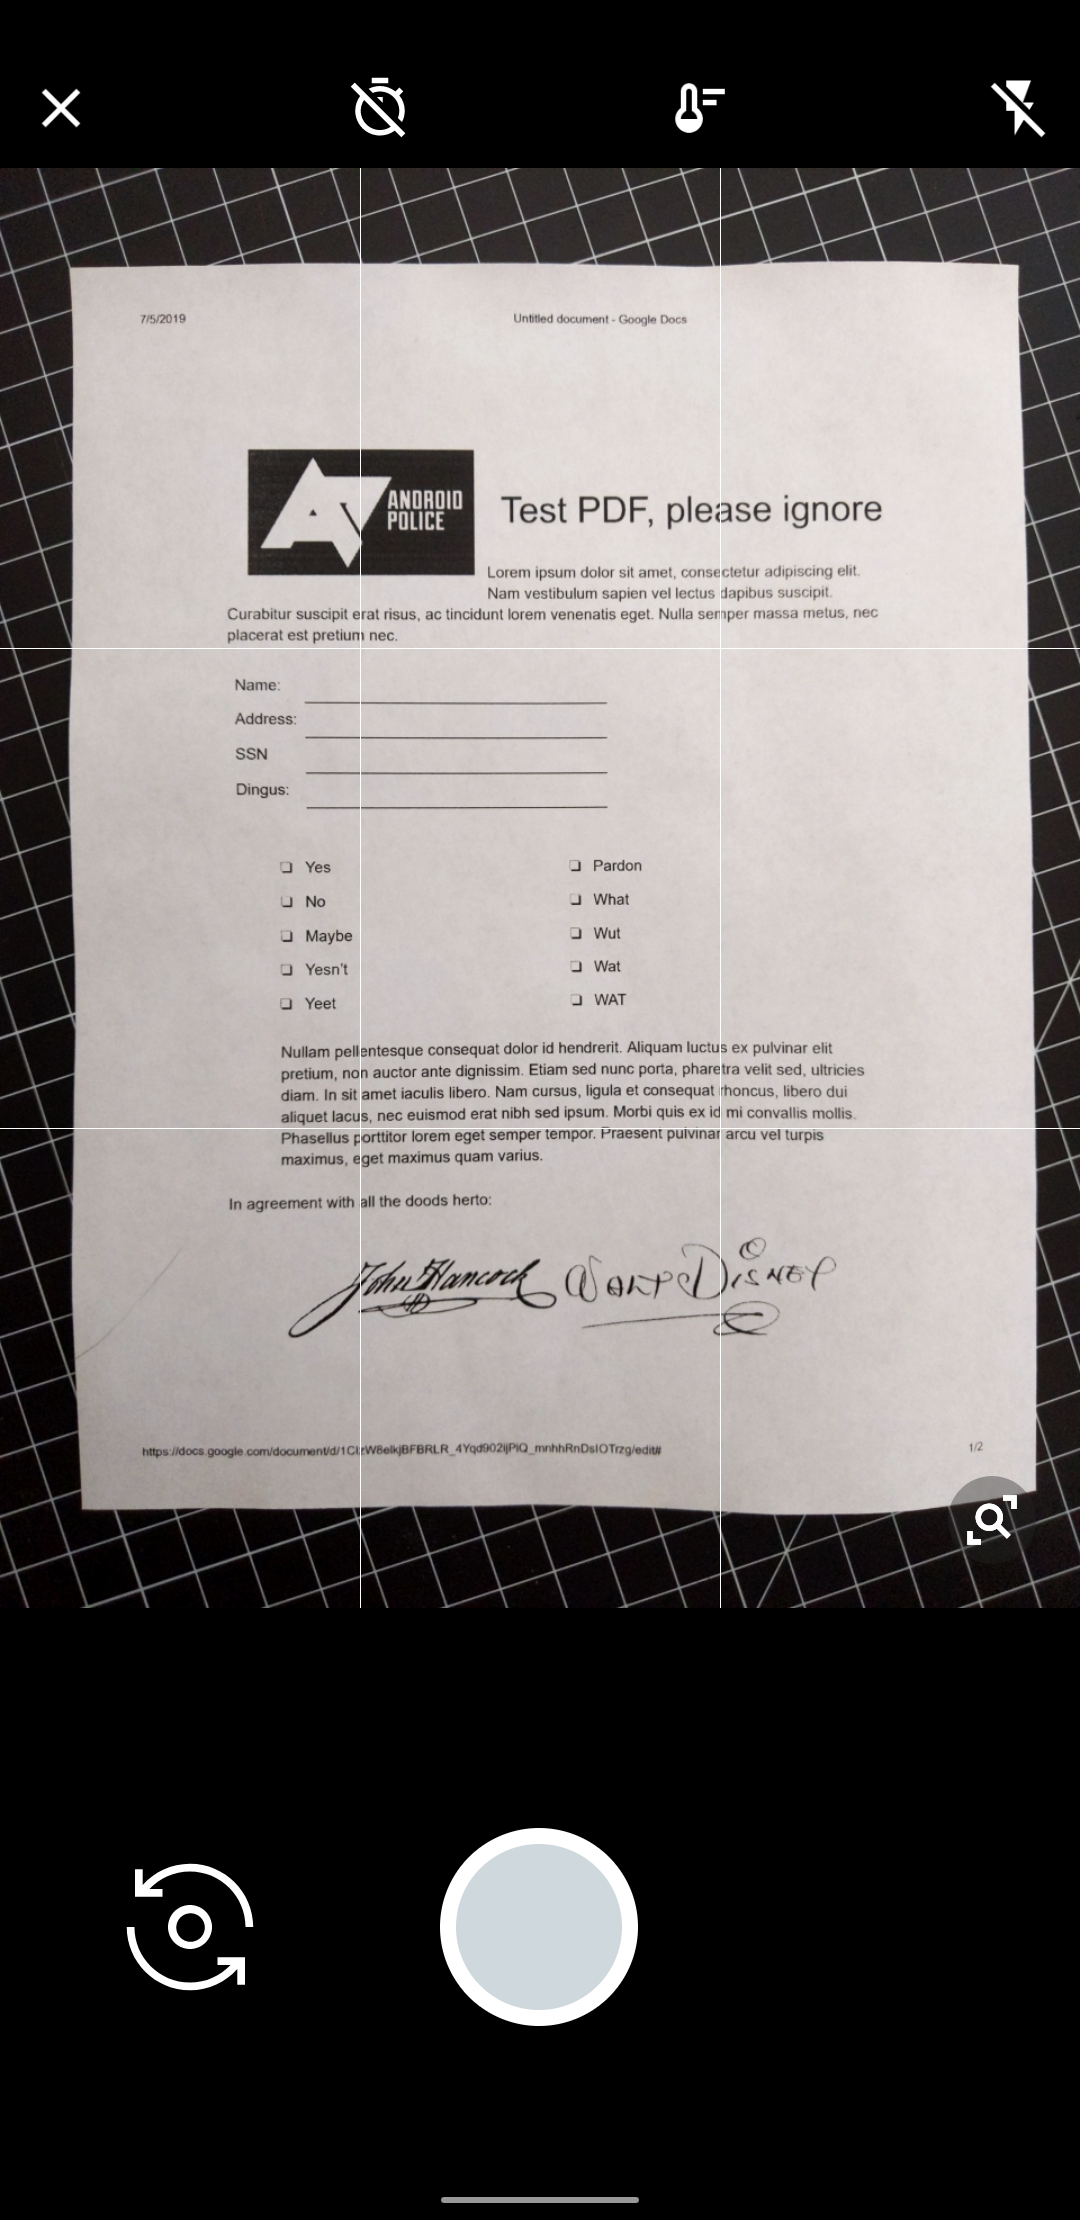
- Drive permits you to evaluate and settle for or reject the picture earlier than changing the picture to PDF.


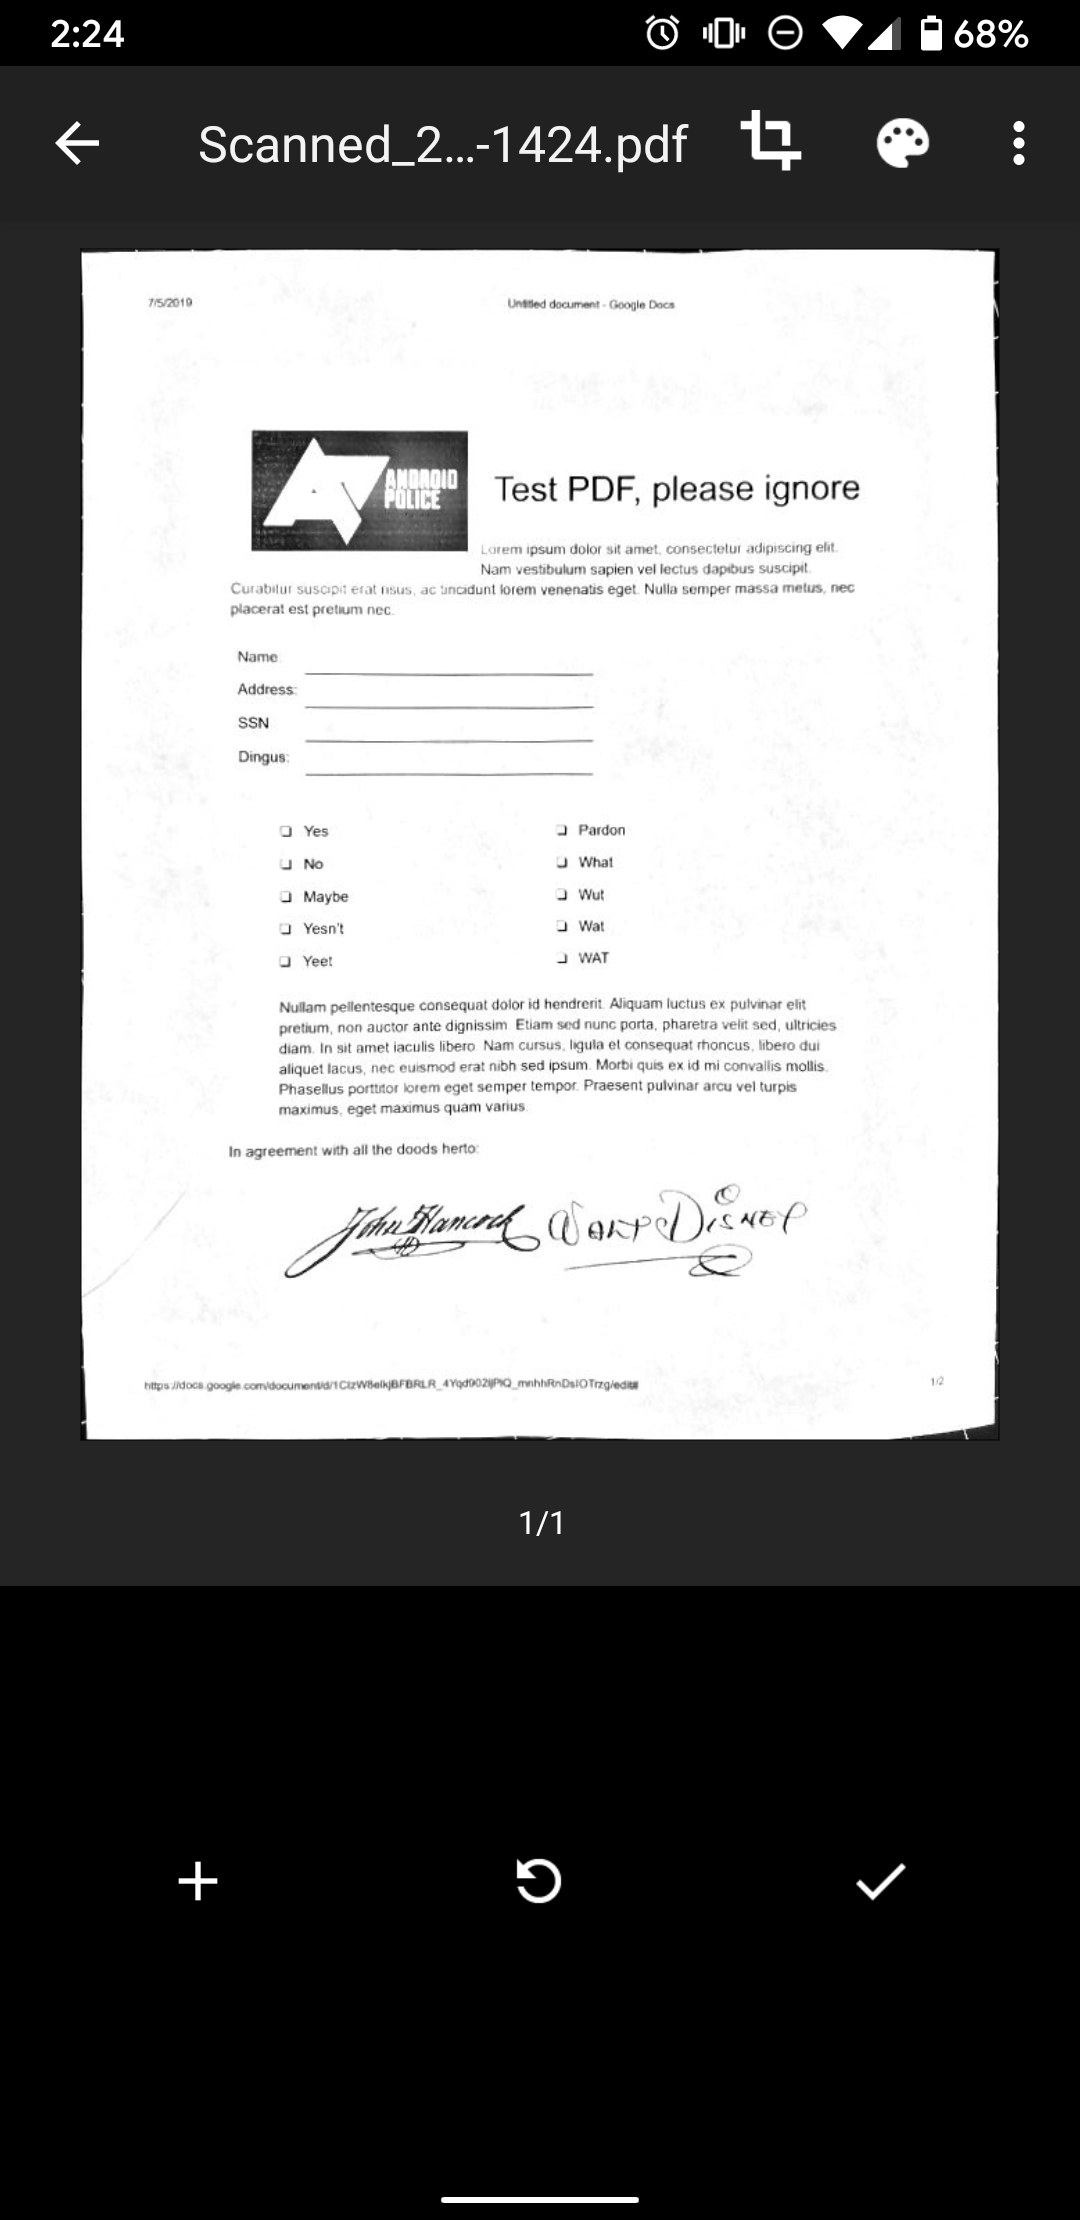
As soon as you’ve got accepted the picture, you may carry out the next steps to scan extra pages or make edits:
- Add extra pages to the present doc (+ icon).
- Re-capture any web page that has been added (reload/redo icon).
- Alter the crop/distortion correction (crop icon within the upper-right nook).
- Change shade settings (palette icon within the upper-right nook).
- Delete, rotate, or rename the scan (three-dot button within the upper-right nook).
- Additional choices within the nested settings menu mean you can change paper dimension, orientation, and picture high quality, although the defaults ought to be fantastic for many conditions.
When you’re pleased with the outcomes, faucet the checkmark within the lower-right nook. Drive asks the place to put it aside in Google Drive and what to call it. It ought to be there after you faucet Save within the lower-right nook. Congrats, you made a PDF along with your cellphone’s digicam.
Drive can mechanically appropriate for perspective, so that you need not fear an excessive amount of if you cannot snag the right shot. It stretches and tweaks issues to compensate by itself, although some content material may find yourself a bit off-kilter.
How you can use Adobe Scan to digitize information along with your cellphone
For those who want a unique set of options than the Google Drive s app can present, and also you’re prepared to surrender the deeper integration with G Suite’s providers, Adobe Scan is a sturdy different to old-school doc scanners. Its benefits embody:
- OCR (optical character recognition), which turns scanned paperwork into searchable, copyable textual content.
- Works with the pictures and images you may have.
- Auto-capture streamlines the photo-taking course of.
- Works with the Adobe Acrobat app for built-in signing and filling out kinds.
How you can scan a doc with Adobe Scan
- Obtain Adobe Scan from the Google Play Retailer.
- Open Adobe Scan and grant related permissions.
- Place your cellphone’s digicam over the scan space, guaranteeing all the doc is in view.
- Adobe Scan mechanically captures the doc as soon as it’s in view.
- For those who’d reasonably manually line up and seize your doc, faucet the Aperture icon to the left of Auto-Seize.
- As soon as you’ve got captured all of the paperwork you need to be included in a given PDF, faucet the gallery icon within the lower-right nook, and it allows you to evaluate your scans.
- From the evaluate display, you may rename the PDF (use the textual content/pencil icon) or use the navigation bar on the backside so as to add extra pages, reorder objects, regulate the crop, rotate photographs, choose shade settings, or delete pages.
- Faucet Save PDF within the upper-left nook if you’re happy along with your scan.


Do not cease at organizing your paperwork
For those who’ve scanned your paperwork in JPG or PNG format, they could find yourself in your Google Photographs storage. Use these helpful suggestions and tips to prepare your assortment to keep away from muddle.